
Follow these steps to add and set your preferred customs broker:
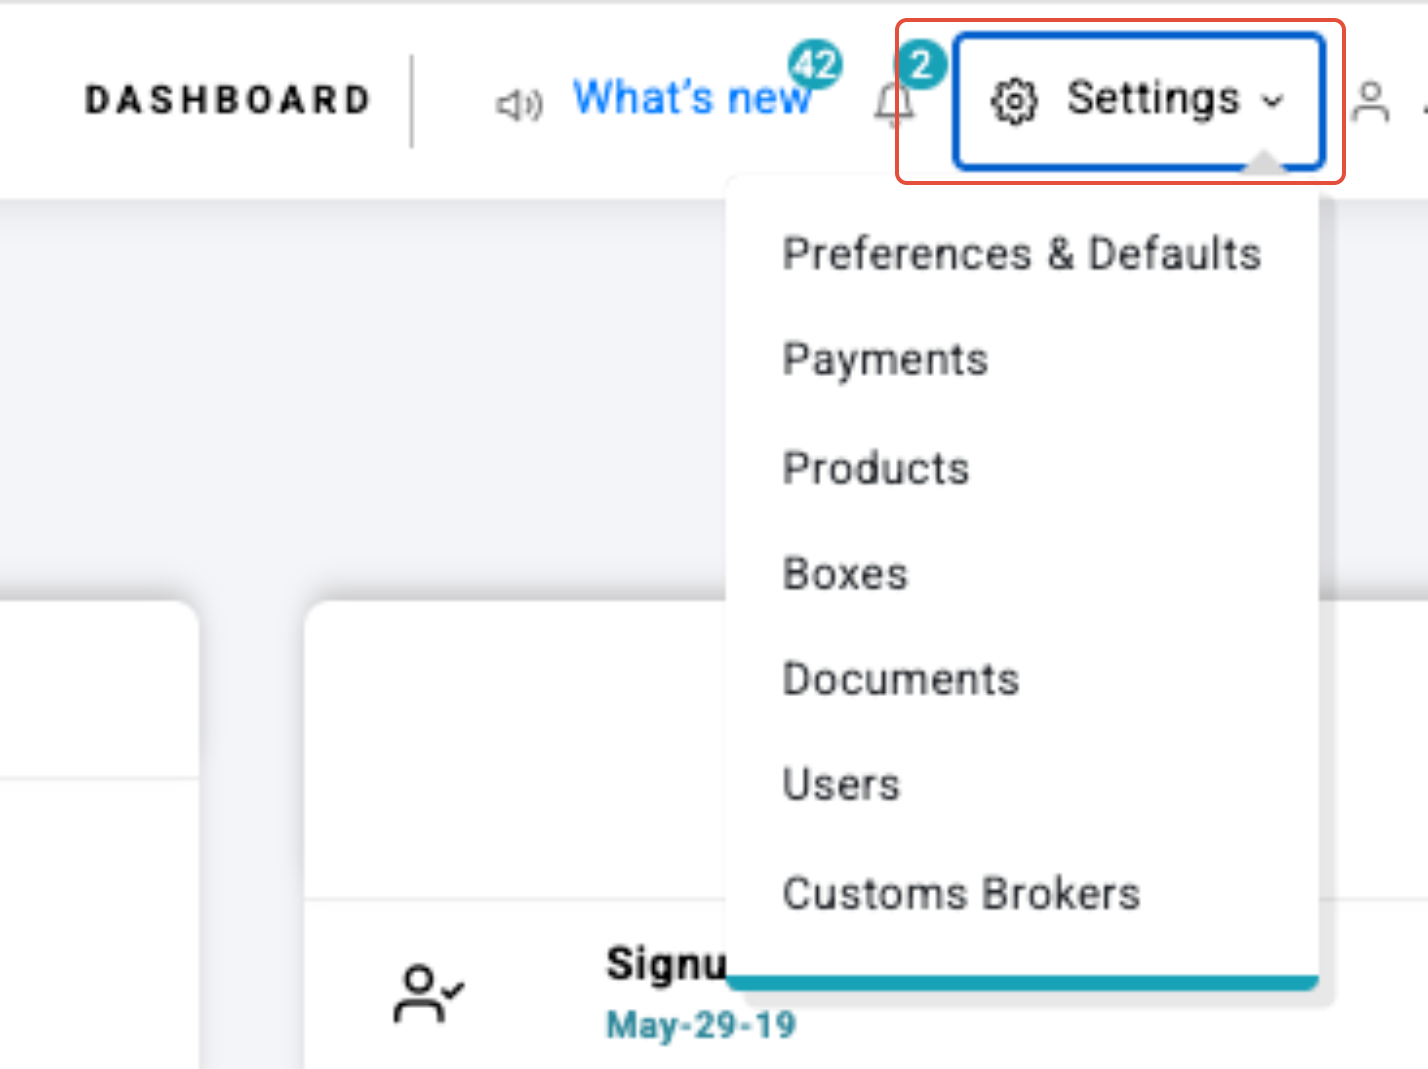
1. Go to Settings
From your ShipTime dashboard, click Settings in the upper right corner.
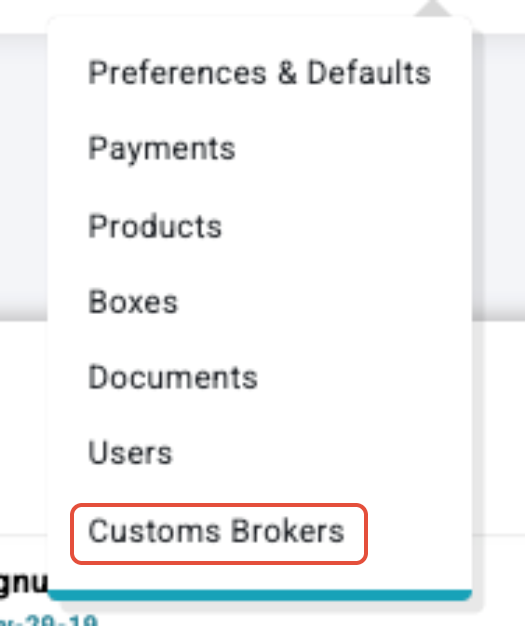
2. Open Customs Brokers
Select Customs Brokers from the settings menu.
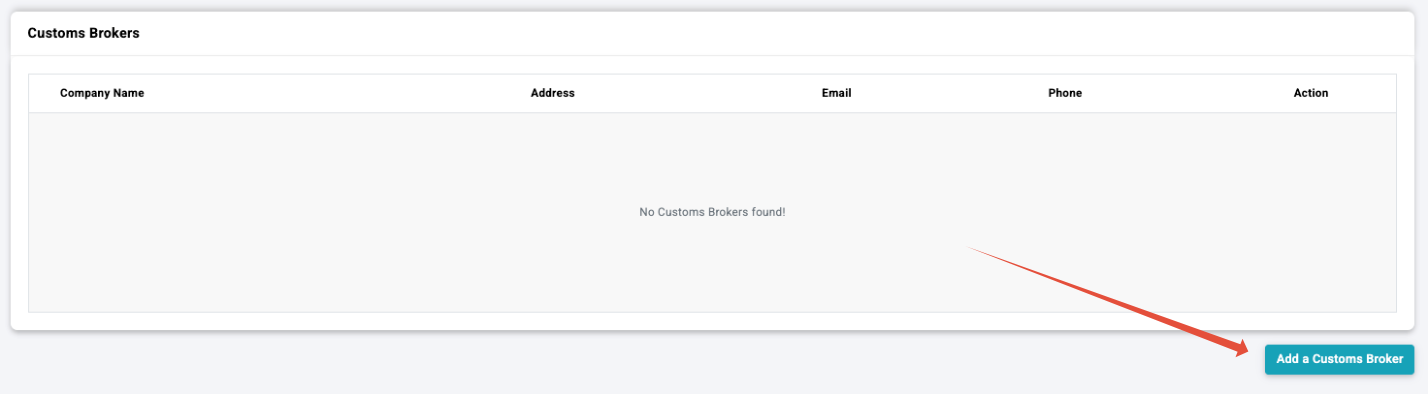
3. Add Your Broker
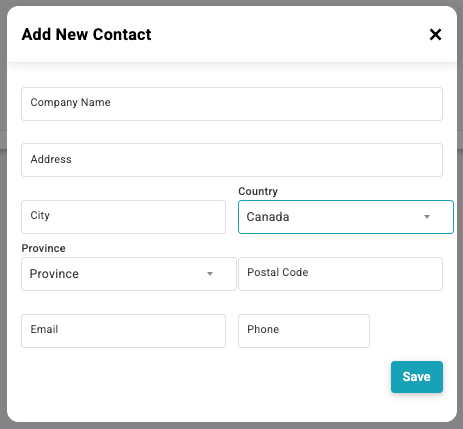
Click Add a Customs Broker.
Enter your customs broker details and click Save.
4. Set as Default
Once saved, your customs broker will appear in your list.
Under the Action area, click the star icon to set the broker as your default.
Your selected broker will now automatically appear on supported international shipping forms.

Shipping Internationally with More Control
ShipTime gives businesses access to tools that help support more efficient cross-border shipping, including features like paperless commercial invoicing, automatic HS code assignment, and the ability to upload customs documentation directly within the platform.