
Managing international shipments often means entering the same customs information repeatedly. With ShipTime, you can save time and maintain consistency by setting a default customs broker that automatically appears when creating eligible international shipments.
This helps simplify cross-border shipping workflows and reduces repetitive data entry when shipping internationally.
Why Set a Default Customs Broker?
Setting a default customs broker can help your business:
Save time during shipment creation
Maintain consistent customs documentation
Reduce manual entry for international shipments
Improve efficiency when shipping across borders
Once configured, your preferred customs broker information can automatically populate during shipment creation, helping keep your logistics operations moving.
How to Set Up a Default Customs Broker
Follow these steps to add and set your preferred customs broker:
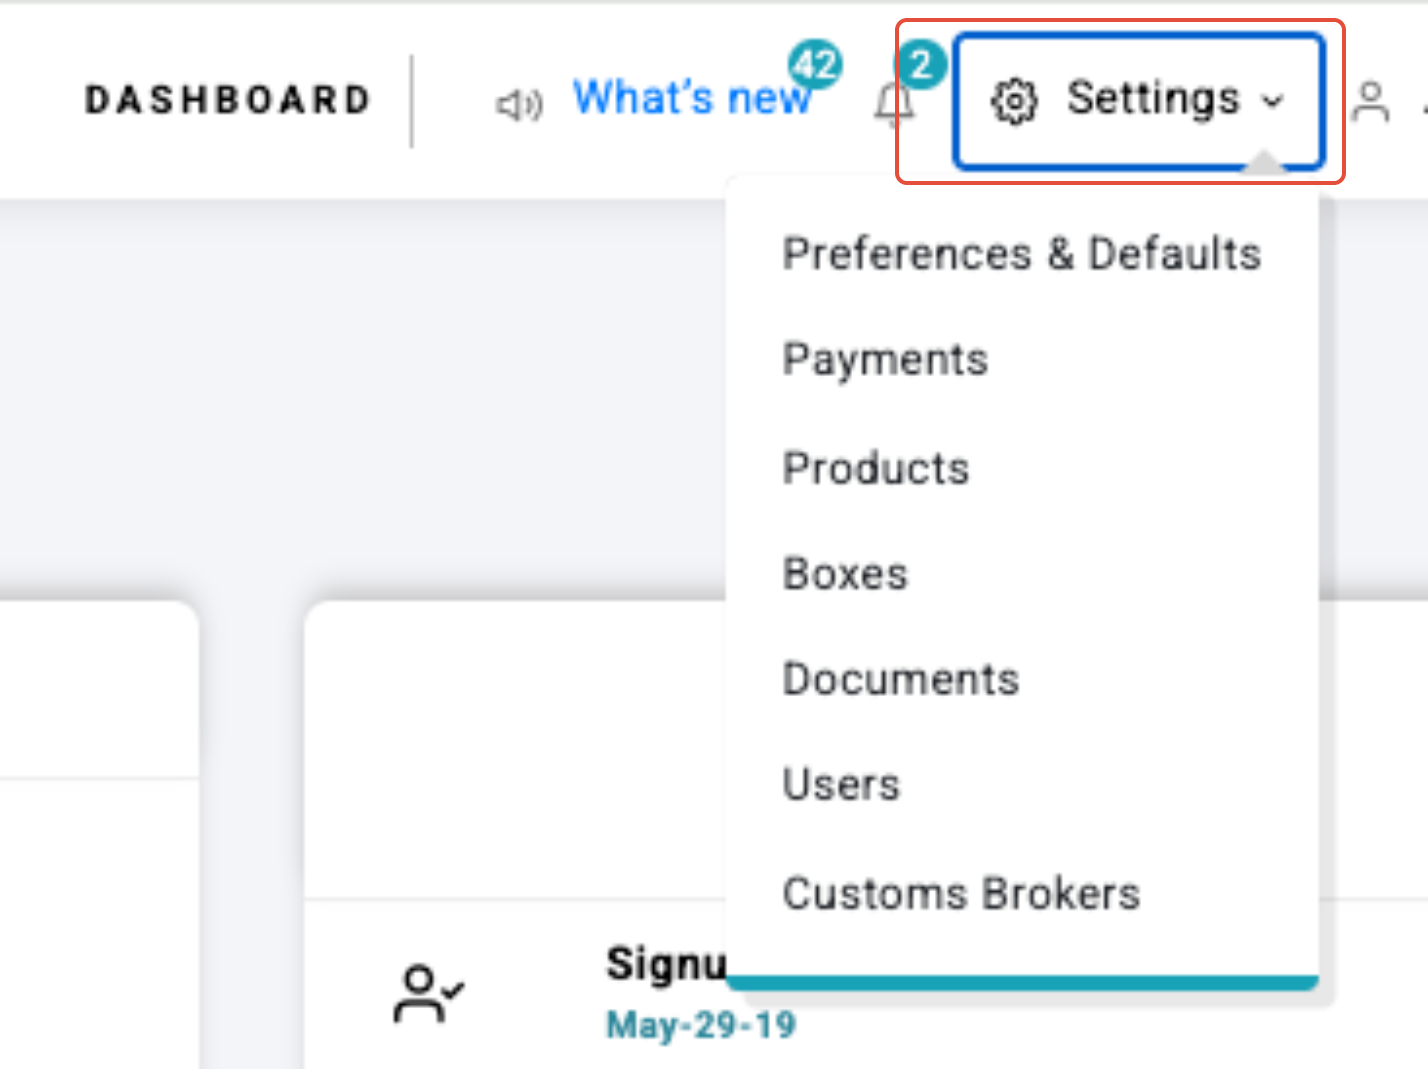
1. Go to Settings
From your ShipTime dashboard, click Settings in the upper right corner.
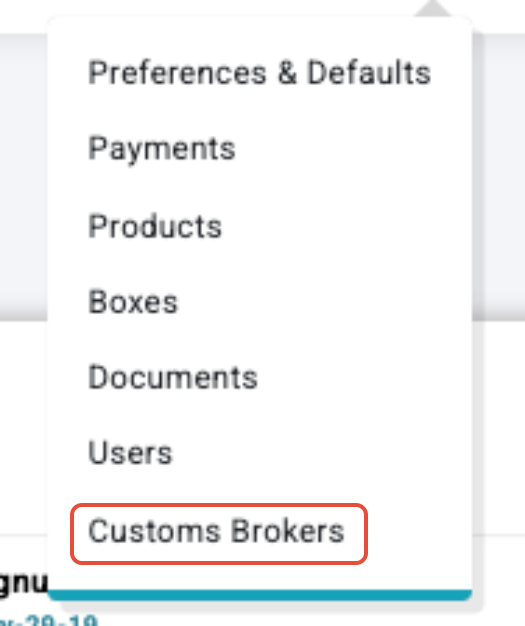
2. Open Customs Brokers
Select Customs Brokers from the settings menu.
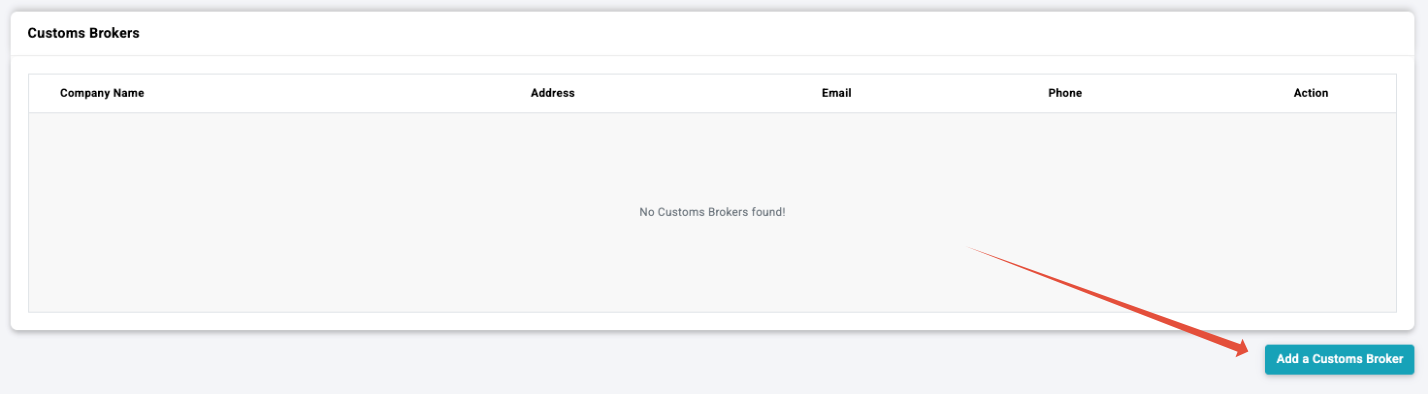
3. Add Your Broker
Click Add a Customs Broker.
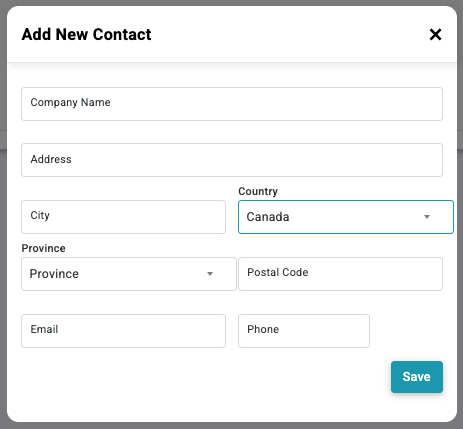
Enter your customs broker details and click Save.
4. Set as Default
Once saved, your customs broker will appear in your list.
Under the Action area, click the star icon to set the broker as your default.
Your selected broker will now automatically appear on supported international shipping forms.

Shipping Internationally with More Control
ShipTime gives businesses access to tools that help support more efficient cross-border shipping, including features like paperless commercial invoicing, automatic HS code assignment, and the ability to upload customs documentation directly within the platform.
Need help setting up your customs broker? Our Heroic Support™ team is available to assist.
New to ShipTime? Sign up today!